
Easy Placeholder Idea for Your Holiday Meals
An Added Touch to Your Table

A Place for you
Let your holiday guests know there's a special place at the table for them this season. This simple project will add an extra touch to your spread. And we know you love going the extra mile, especially during the holidays!
For this project you will need:
● A Digital Design – These instructions are intended for the placeholder download files available when you sign up for my Studio Newsletter.
● Adobe Acrobat Reader – This free download allows you to view and print digital files. Download it here. Please follow the instructions provided. For this project if you have Acrobat Pro you will be able to edit the names in the file. See below.
● Paper – I suggest high-quality card stock as thick as your printer can handle for the notecards. A good choice is Neenah card stock with a 110 lb. weight is available on Amazon, at Walmart, and Office Depot. Other choices are 110lb. card stock at Michaels and Joann Fabric and Crafts.
● A Printer – Most printers give you great results if you print with a high-quality print setting. If you don’t have a printer, I suggest using a local print shop.
● A Paper Cutter – A Fiskar like the one pictured below works. And it also serves as a scorer, which I suggest you use for a nice clean fold. You can find the cutter on Amazon or Joann’s.
● A Corner Paper Punch – Available on Amazon.
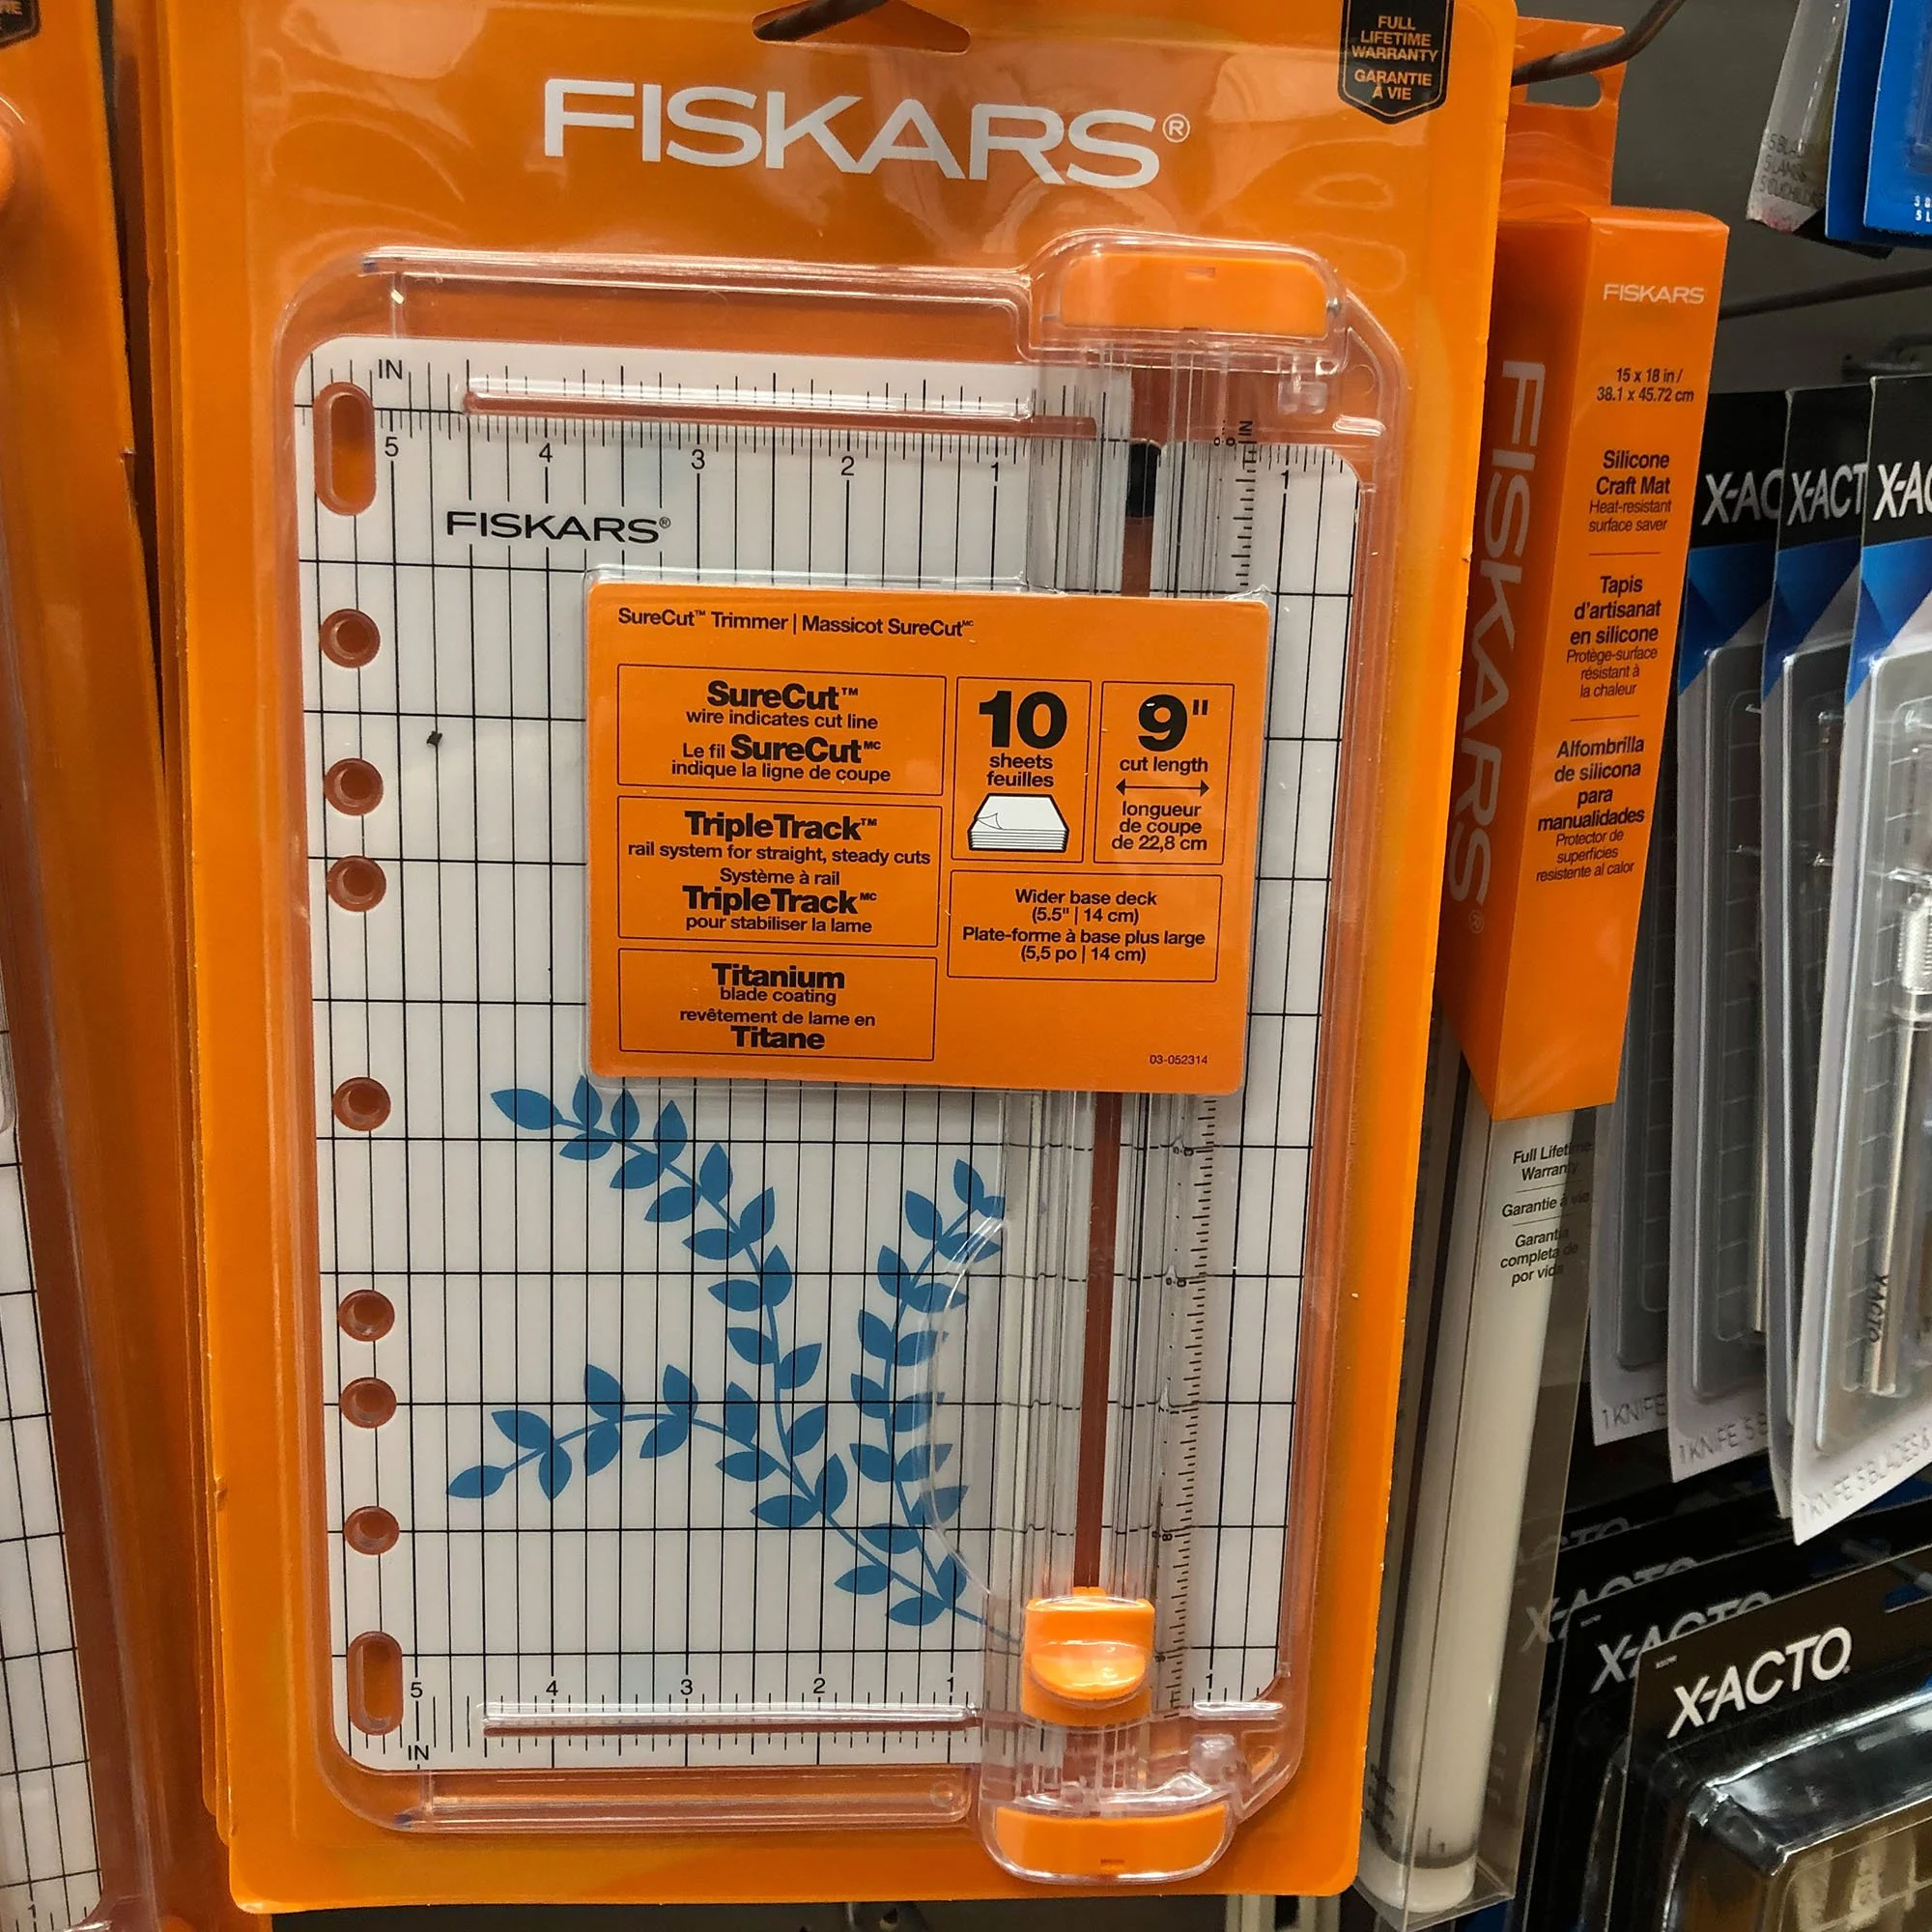
You need to buy the scorer separately, which is available on Amazon.
The scorer is designed to fit in where the blade is located, featuring a dull edge that creates a groove in the card stock, helping you achieve a clean fold.
Let’s get started.
How to Download the File
To download the notecard file, follow these steps on your Etsy Order Page: Click the provided link, which will direct you to the download page. Once there, click on the link to download the zip file containing the notecard designs and instructions. Retrieve the file from your download folder and relocate it to your preferred storage location on your computer—I personally use a folder named Digital Downloads.
Getting Ready to Print
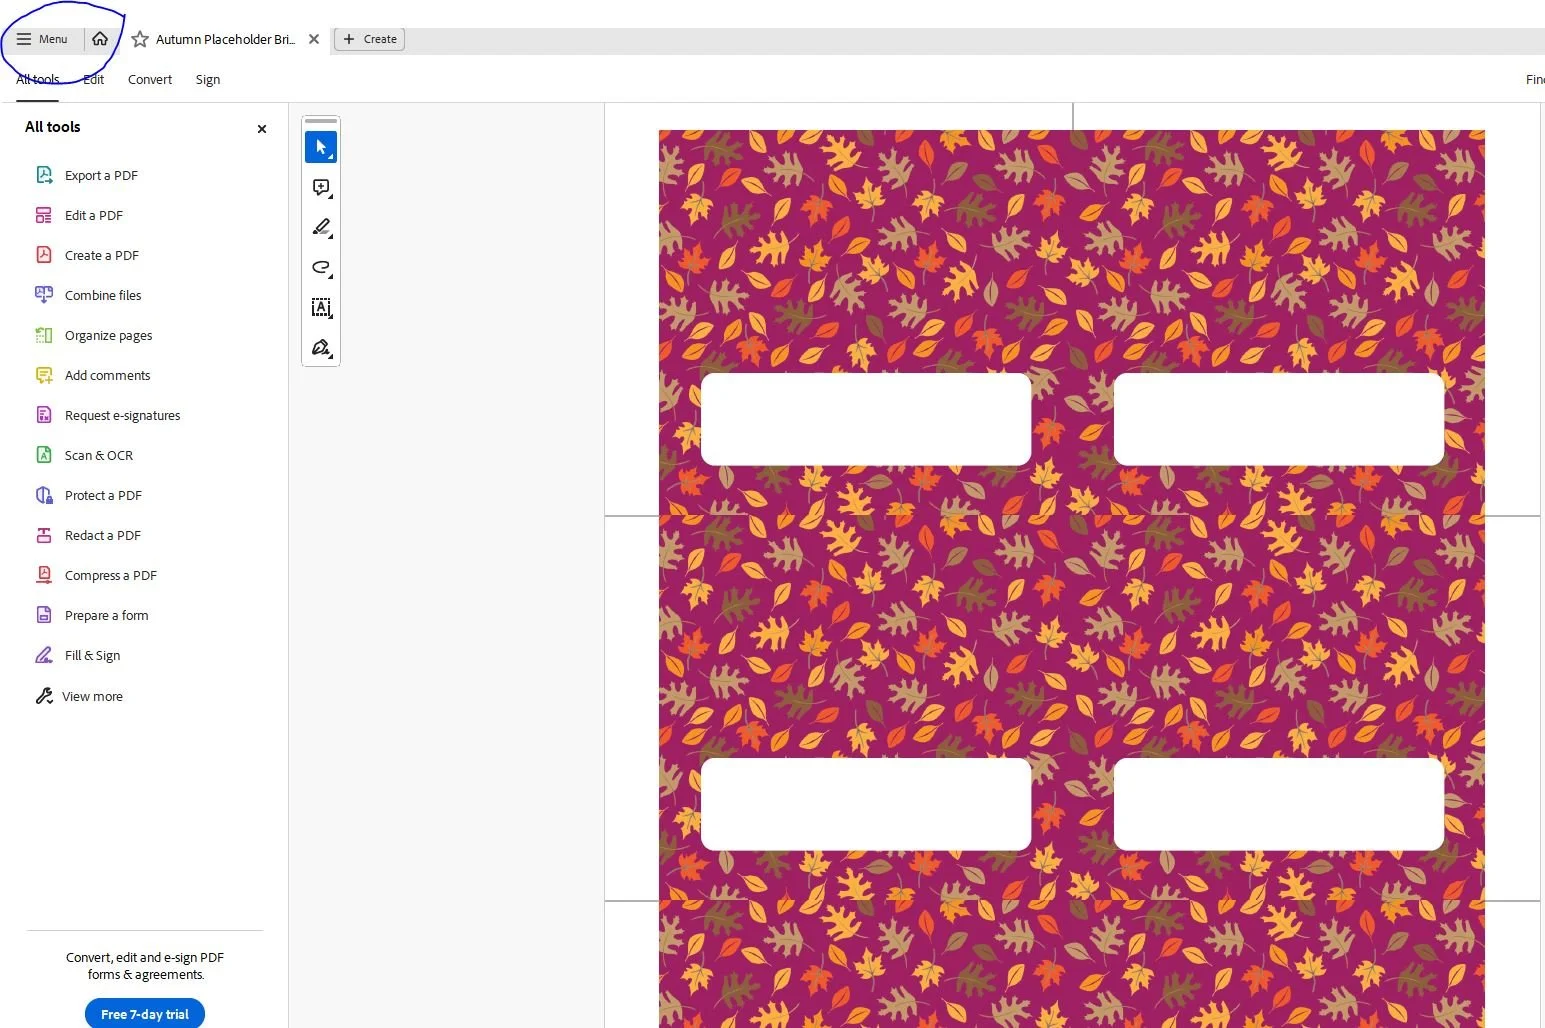
After downloading the placeholder file, you'll have multiple options. One file offers two designs and six color choices to print. The first option is to print a blank placeholder in your chosen color and write the names by hand using a felt-tipped pen. Alternatively, if you have access to Adobe Acrobat Pro, you can edit the names on the file before printing, using the pages where “Name” appears on the placeholders.
Editing an Acrobat File In Acrobat Pro
Open the file, and on the left-hand options, select "edit". Hover your cursor over the text “Name” and type your guest’s name. You might need to adjust the placement of the name. The font I used is a Google font called Festive, available here. You can add it to your fonts or choose a different font.*
Once you've finished editing all six placeholders on a sheet, save and print the edited sheet. For more than six names, use different color choices or repeat the process. Alternatively, duplicate the chosen color page and fill in the names on the duplicate sheet. Don't forget to save the Acrobat file.
Using Acrobat to Print
Open the placeholder file in Acrobat, right-click on the file and choose "Open in Acrobat Reader." Once your file is open in Acrobat, find the MENU tab in the upper-left corner of the page. Click it, and a dropdown menu will appear. Choose the "Print" option..
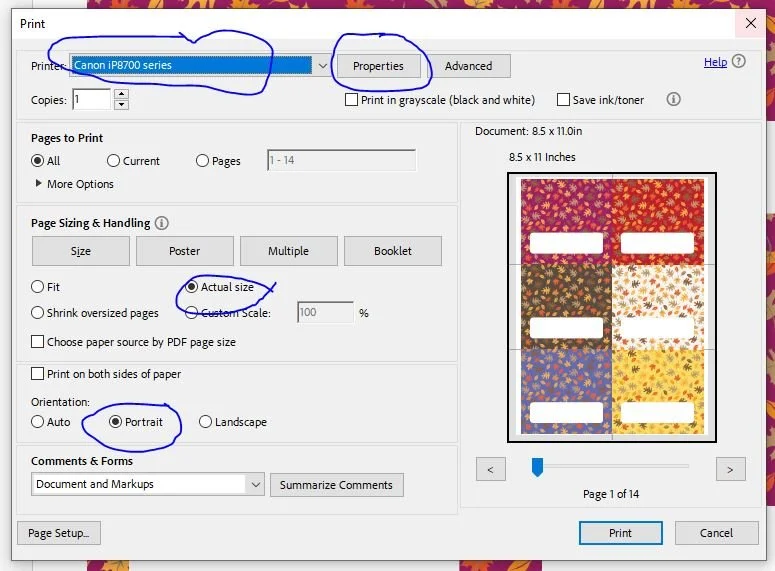
A dialog box will open. Select your printer. Select portrait for the notecards. Select Actual Size.
Make sure the print orientation matches the file orientation. Choose Portrait for the placeholders.
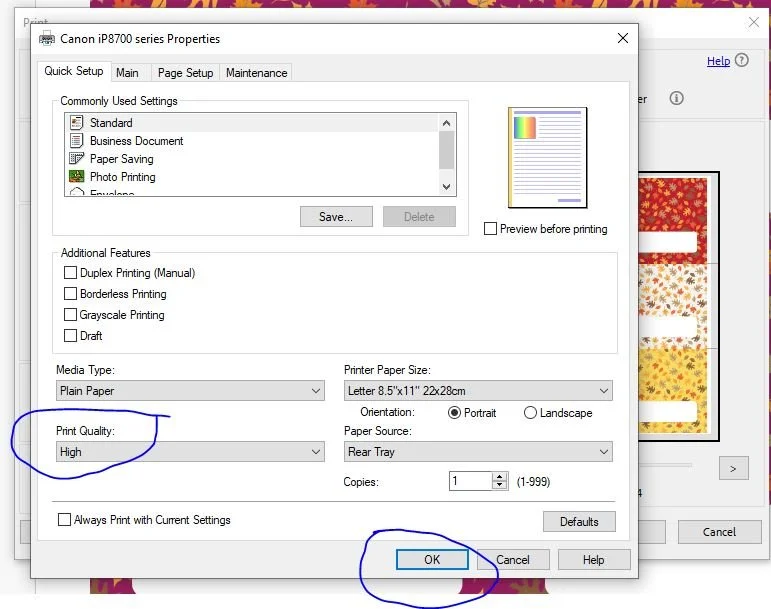
Go to properties at the center top of the dialog box. The properties dialog box will appear, and select High-Quality Print. Make sure to save your selection by hitting OK at the bottom right. The properties box will close. Make sure you have your paper loaded in the printer and click print.

Pro tip:
Print only one page of the placeholders to ensure the page has printed correctly before proceeding with the rest. In the print panel, set up the test by entering "1" in the "Pages to Print" section. If the test page looks satisfactory, proceed to the next step: cut and fold the placeholders to verify the correct size.
If the placeholders look good, go ahead and print the remaining copies.
Completing the Placeholders
Cutting the Placeholders
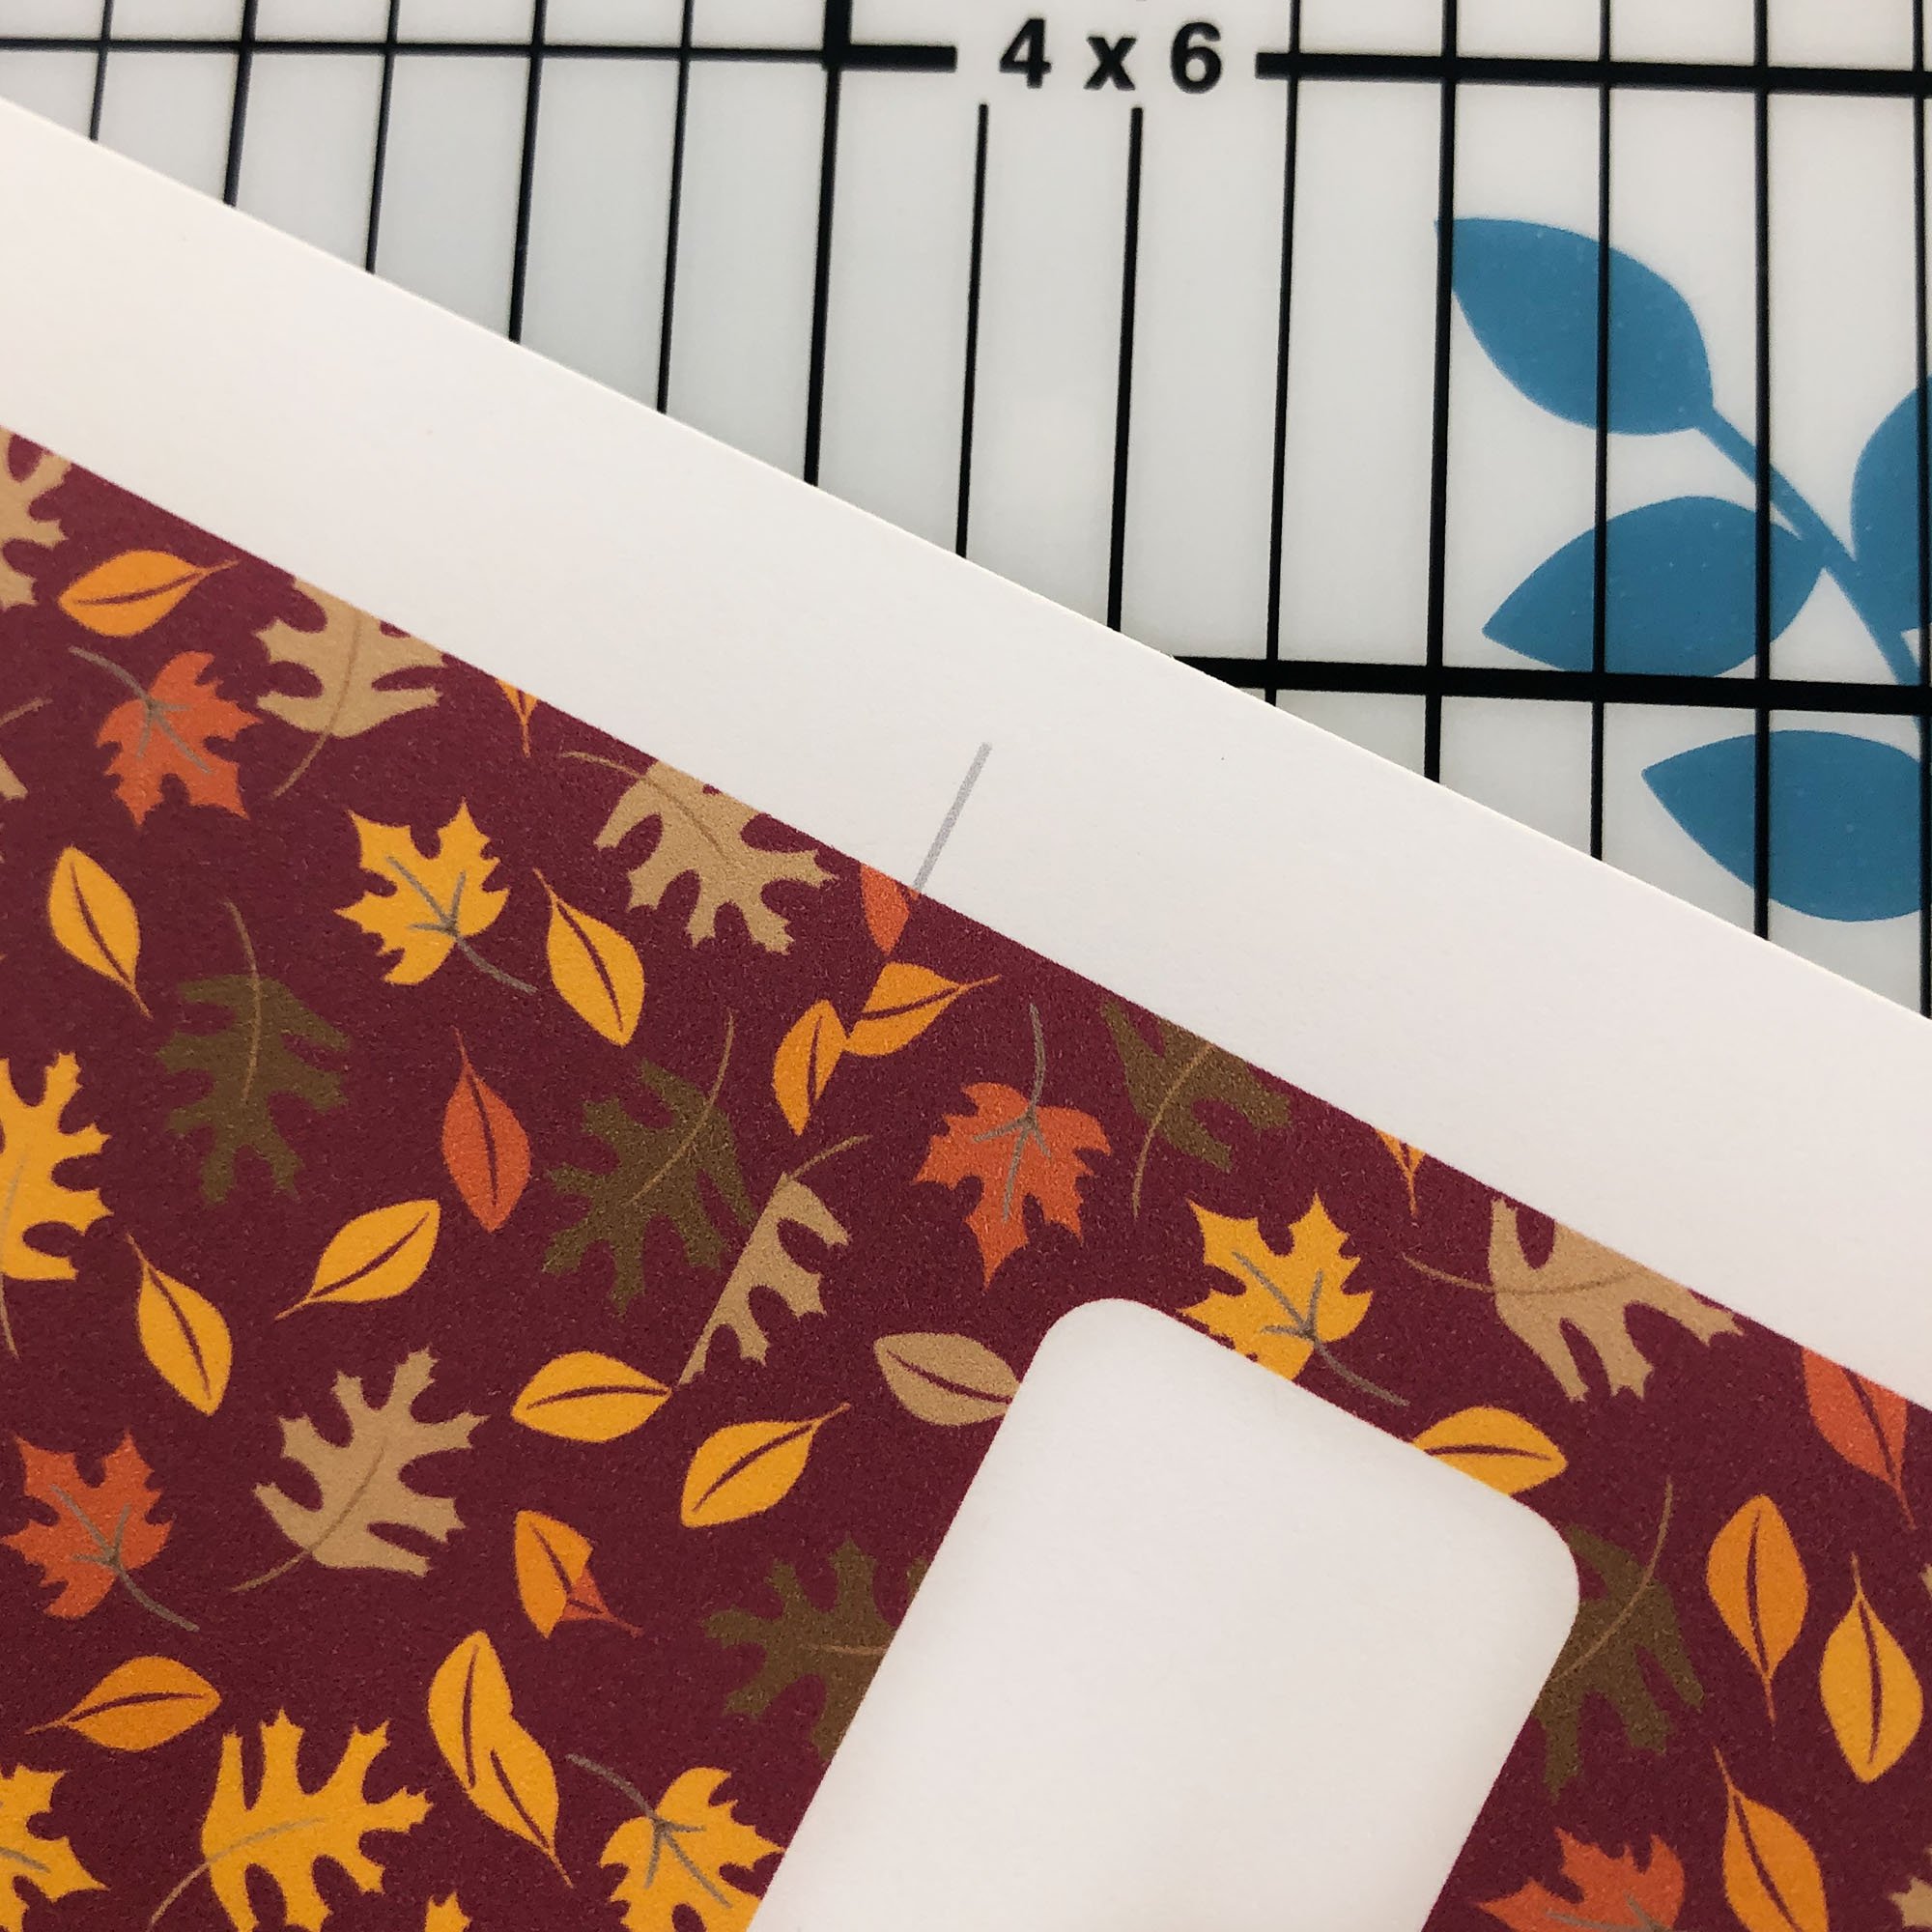
After printing the placeholders, cut them using the marked lines on the sides of the page.
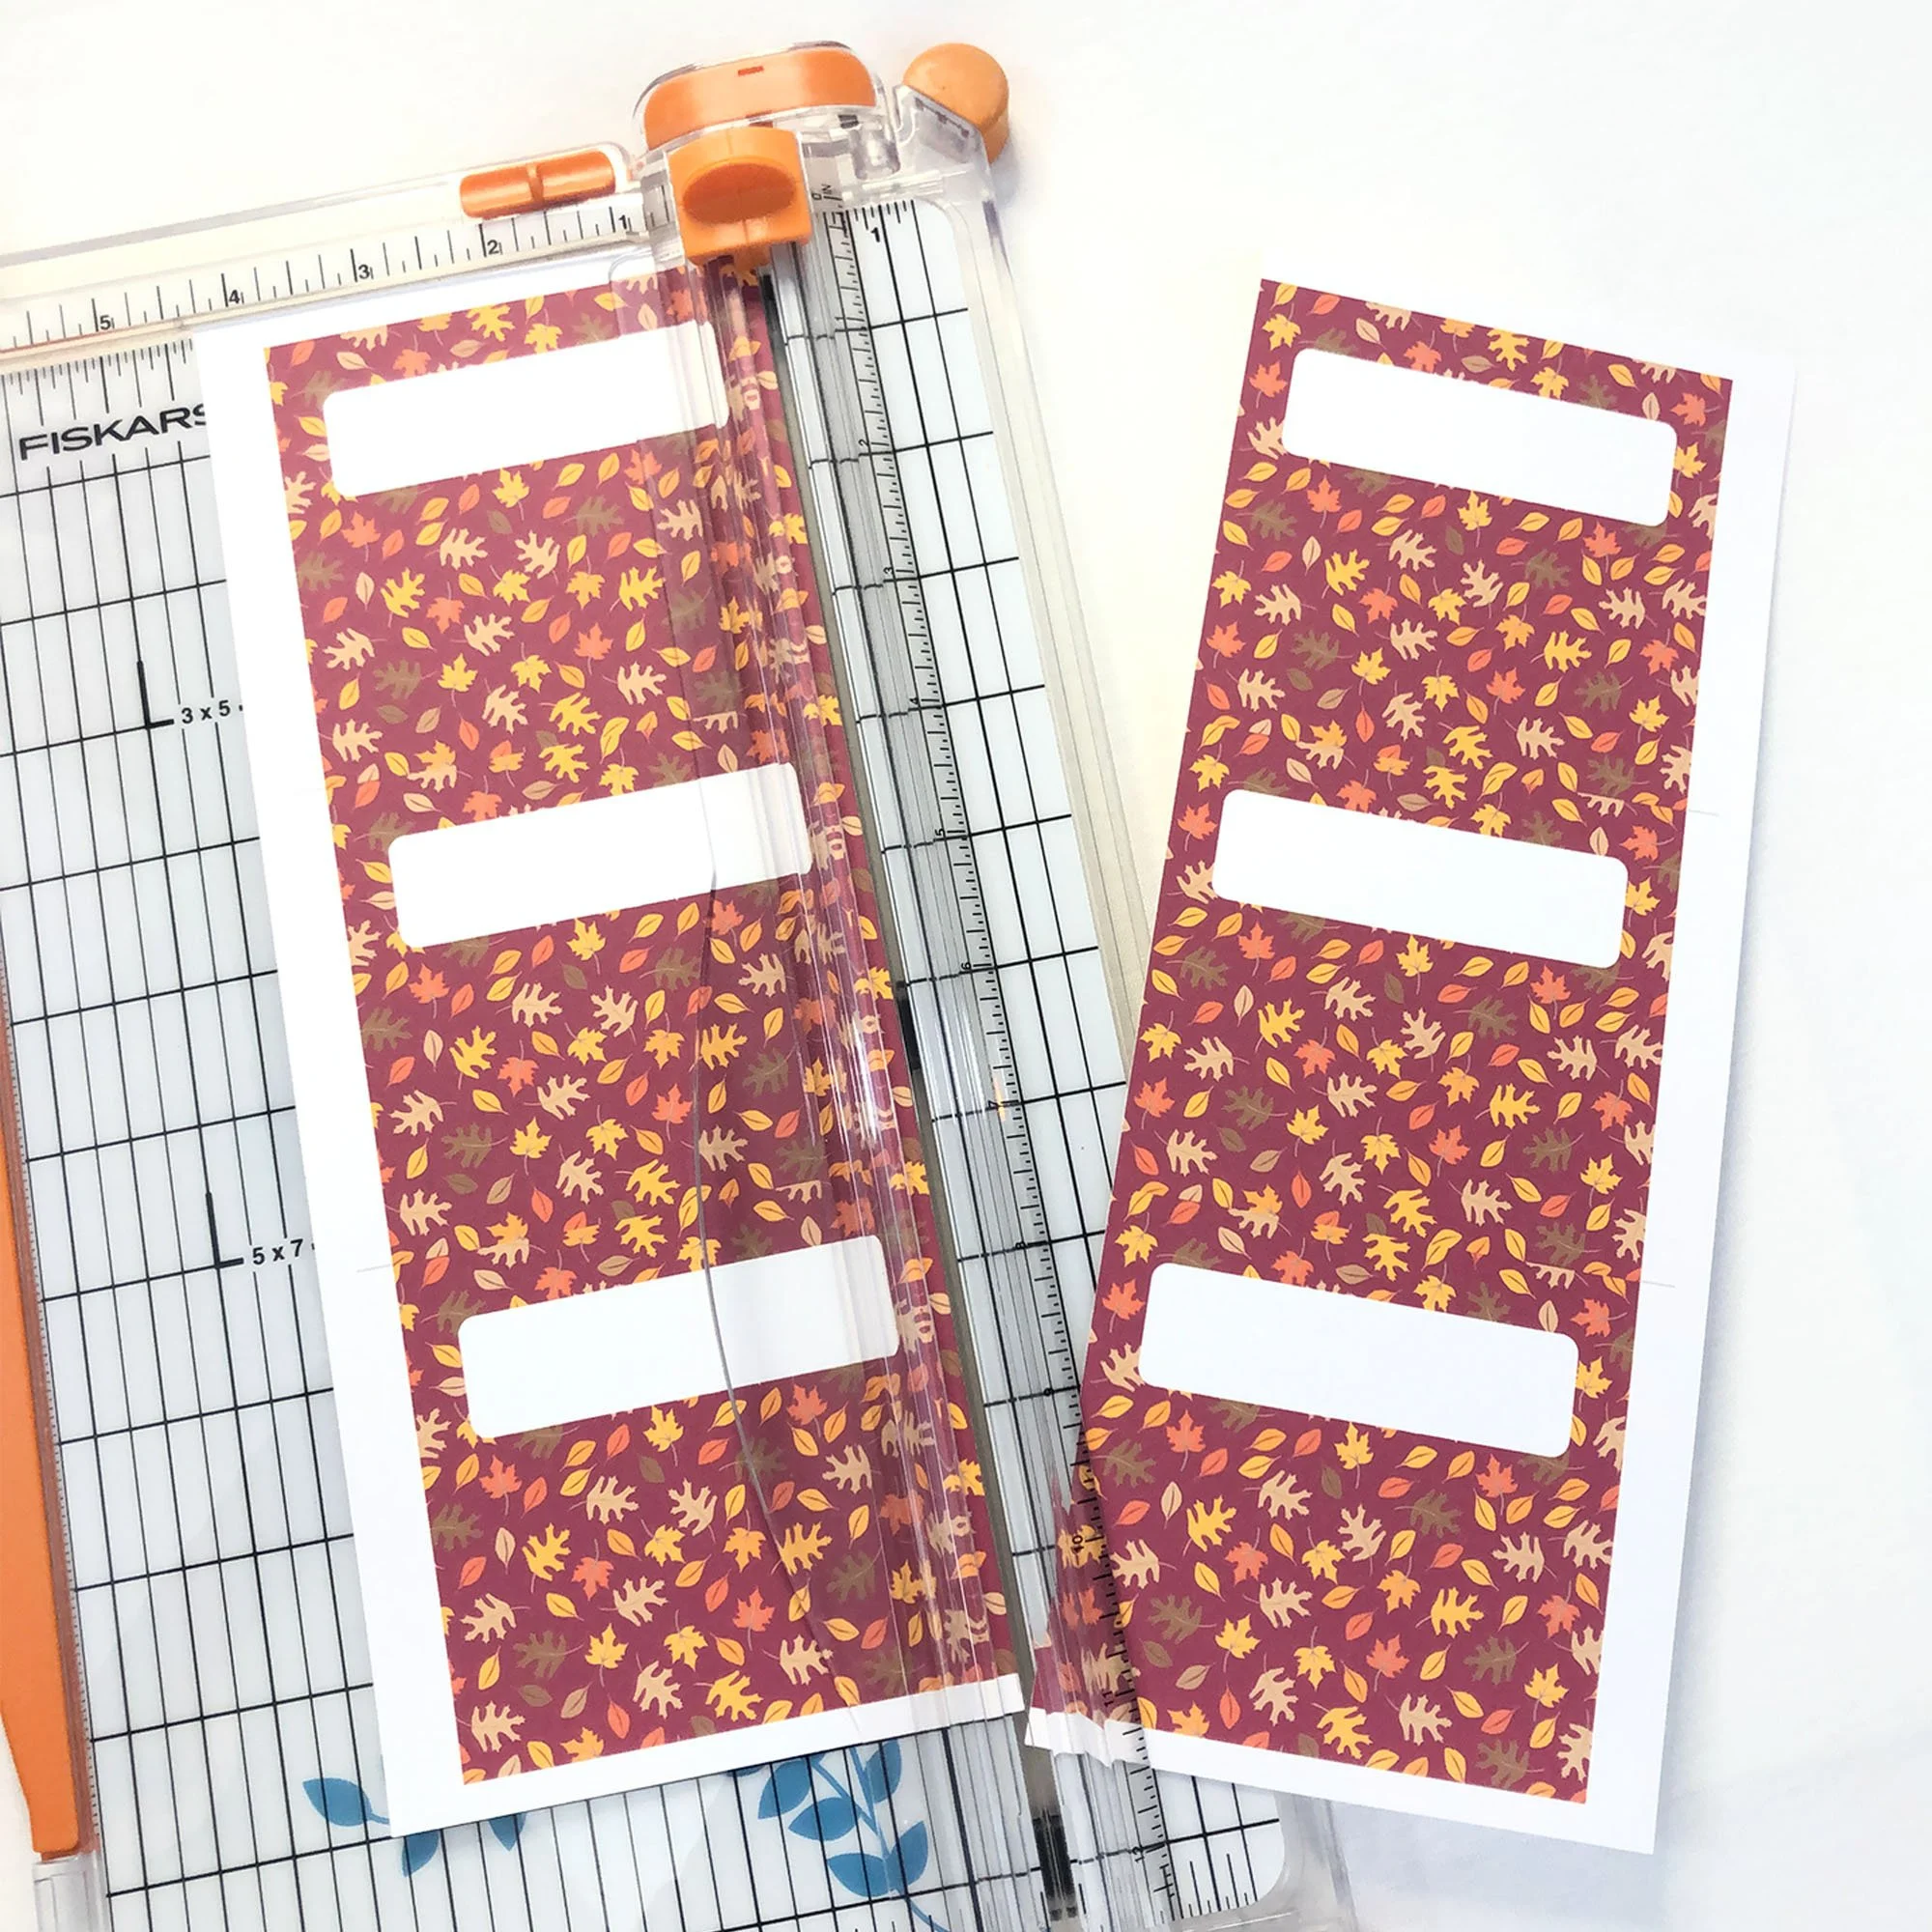
Start by cutting down the center.
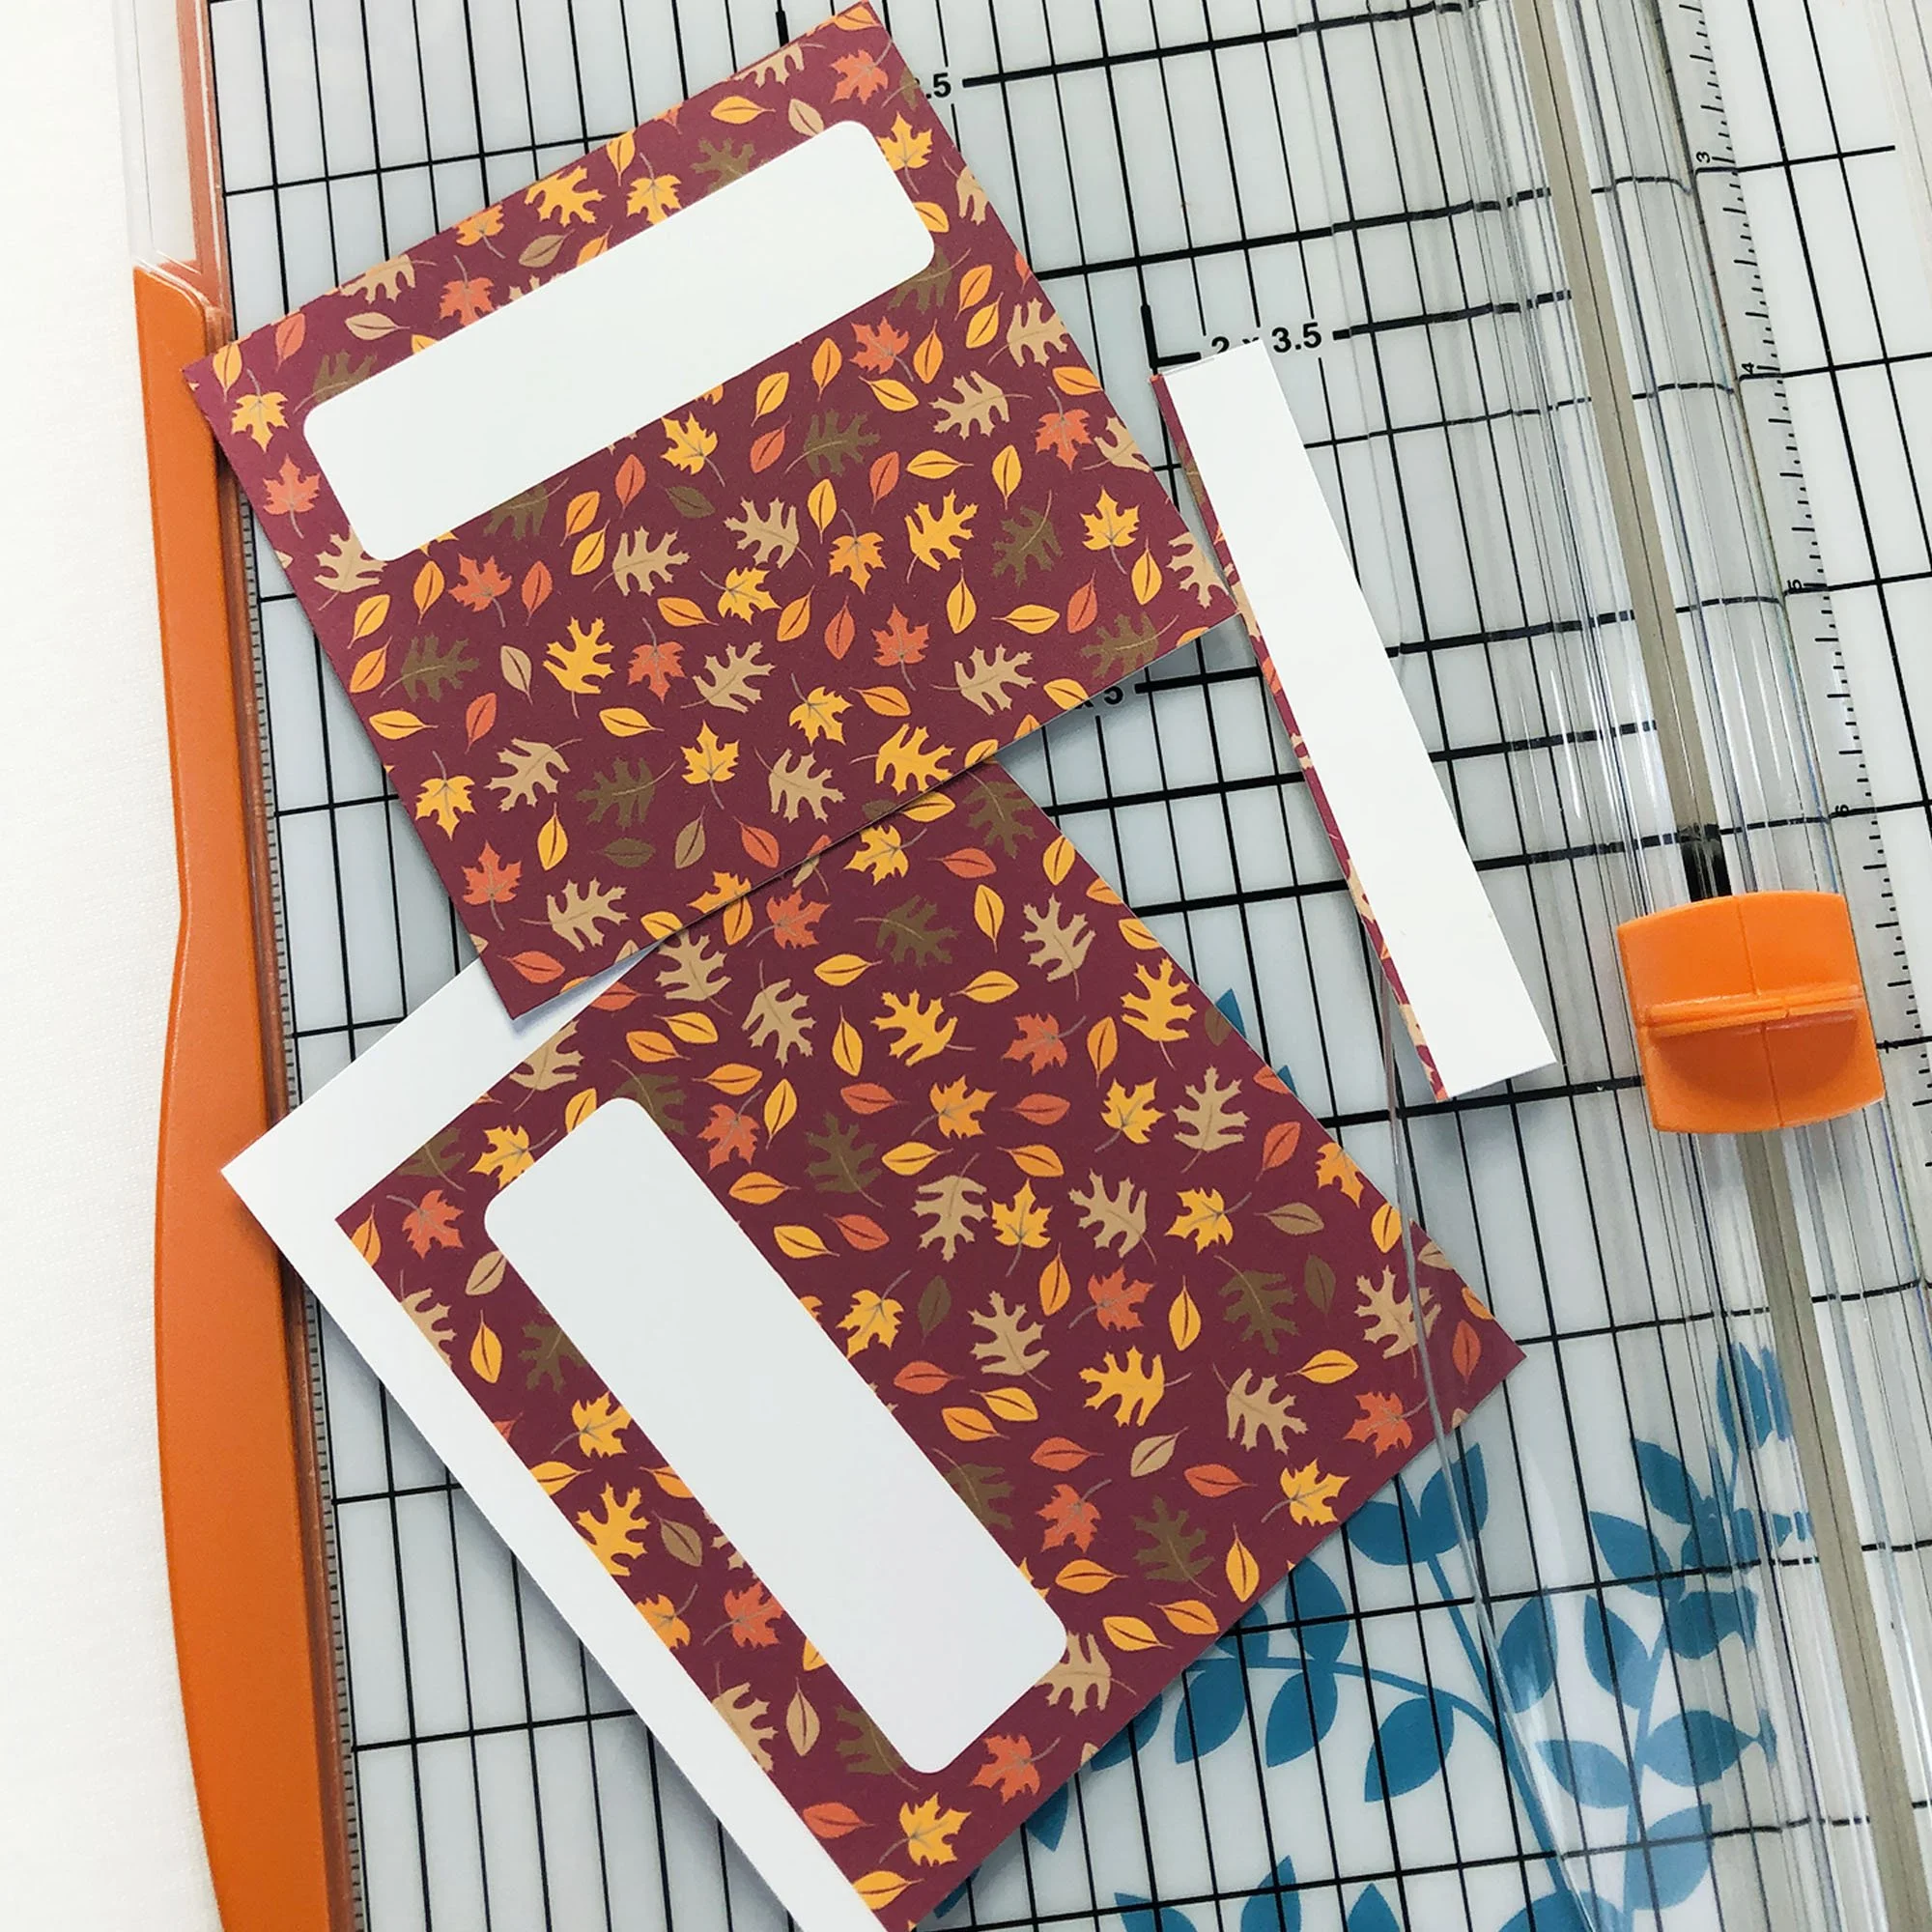
Then proceed with the horizontal cuts, and finally, trim the edges. Following this order ensures the cut marks guide your trimming, preventing accidental removal when cutting the vertical edges first.

Scoring the Placeholders
First you will need to change the cutter to a scorer. You can find instructions for that HERE.
Score the cards in the center and fold them. The center of the card is 1.75-inches.

Finishing the Corners
For an extra touch, use a corner paper punch to round off the edges.